If you want your yard to be safer, more usable after dark, and better looking year-round. In Grants Pass, evenings come early in fall/winter and summer nights are perfect for outdoor living—good lighting stretches both seasons. Thoughtful, low-voltage LED systems add safety along steps and paths, highlight trees and garden structure, and bring your new patio to life—without blowing up the budget.
How Landscape Lighting Fits with Landscape & Gardening Plans
Lighting works best when it’s planned alongside planting and hardscape—not tacked on at the end. If your project includes new garden beds, irrigation, and a patio, coordinate trenching and conduit before plants go in and before concrete is poured.
Plant-First, Light-Second
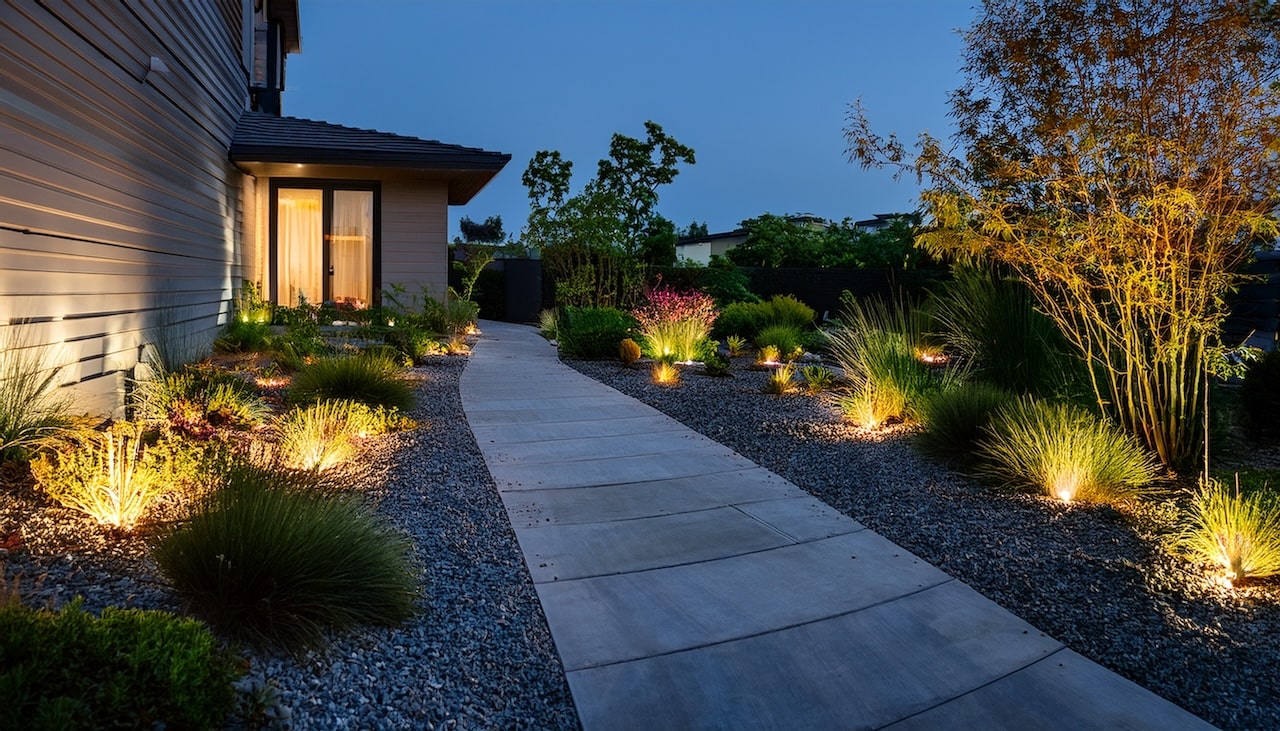
In Southern Oregon, it helps to design the planting first and the landscape lighting second—just do the planning together. Let evergreen structure be your anchor: conifers, manzanita, and broadleaf evergreens create natural focal points that come alive after dusk with a few well-placed uplights. Seasonal beds look best under soft washes that use low, wide beam spreads to keep color without harsh hotspots. To protect roots and avoid tearing up fresh beds later, map cable routes and sleeves before planting day.
Southern Oregon Realities: Heat, Rain, and Dark-Sky Sensitivity
Local conditions shape the details. Summers are hot and dry while winters run cool and wet, so choose fixtures and connectors rated for wet locations with corrosion-resistant metals. Rain can turn any mis-aimed light into glare, so favor shields, lower mounting heights, and warmer color temperatures for comfort. To keep skies dark and neighbors happy, aim precisely, use louvered or fully shielded fixtures, and skip blue-tinted lamps so the stars still shine.
Helpful comparison (materials & durability):
| Fixture Material | Durability in Wet Areas | Maintenance | Typical Cost Tier |
| Cast Brass | Excellent (won’t rust) | Low | $$–$$$ |
| Marine-Grade Stainless | Very good | Low–Medium | $$–$$$ |
| Powder-Coated Aluminum | Good, but coating can chip | Medium | $–$$ |
What Does Landscape Lighting Cost in Grants Pass?
Prices vary by fixture quality, site access, trenching length, and control system. Below are ballpark ranges we see for professional, low-voltage LED systems in Southern Oregon. (These include transformer, cable, connectors, installation, and aiming.)
| Installation | Typical Fixture Count | What’s Included | Est. Installed Cost* |
| Basic | 6–10 | Path + a few accents, basic timer | $1,800–$3,500 |
| Standard | 12–18 | Paths, tree accents, patio edges; smart timer or app hub | $3,800–$6,500 |
| Showcase | 20–24 | Multi-zone layers, steps/walls, advanced controls | $7,000–$10,000 |
*Actual proposals depend on run lengths, fixture grade, terrain, and access.
Operating Costs & Energy Efficiency
Modern LED fixtures typically draw 2–7 watts each. With timers and dusk-to-dawn scheduling, monthly electricity costs usually stay modest.
Typical wattage & kWh estimate:
| Fixture Type | Typical LED Wattage | Hours/Month (timed) | Monthly kWh (10 fixtures) |
| Path Lights | 2–3 W | ~120 | ~2.4–3.6 |
| Accent/Spot | 4–7 W | ~120 | ~4.8–8.4 |
| Wall/Step | 2–4 W | ~120 | ~2.4–4.8 |
Example: 14 fixtures averaging 4W, running 4 hours/night = ~2.2 kWh/week. At common local rates, that’s just a few dollars per month.
Timers, dimmers, or motion sensors near utility areas (side yards, trash/recycling) can trim runtime without sacrificing safety.
The “Concrete Question” — Integrating Lighting with a New Patio
If you’re researching the cost of concrete patio installed, plan lighting at the same time. It’s cheaper to place sleeves and conduit before the pour than to cut into fresh concrete later.
Integrating Lighting with a New Patio
If you’re researching the cost of concrete patio installed, plan the lighting at the same time. It’s almost always cheaper and cleaner to place sleeves and conduit before the pour than to cut into fresh concrete later. Early coordination lets you choose fixture locations, plan safe cable routes, and avoid costly do-overs once the slab is down.
Pour Timing, Conduit, and Sleeves
Before the pour, lay out exactly where step lights, column or post lights, and seat-wall lights will go so the crew knows where to leave access. Run conduit first by installing PVC sleeves beneath the slab and across expansion joints so low-voltage cable can pass cleanly from zone to zone.
To future-proof the space, add one or two extra sleeves to any areas you might light later, such as a grill island, water feature, or future pergola posts. This small step gives you flexibility without tearing up concrete down the road.
Simple Patio Coordination Diagram
Think of the pathway like this: conduit runs from house power to a discreet transformer location, ideally tucked near shrubs or screening.
From there, sleeves branch to the seat wall, steps, and perimeter planting beds, with an additional spare sleeve aimed at a possible future feature zone. With this routing in place, installation and later upgrades stay straightforward.
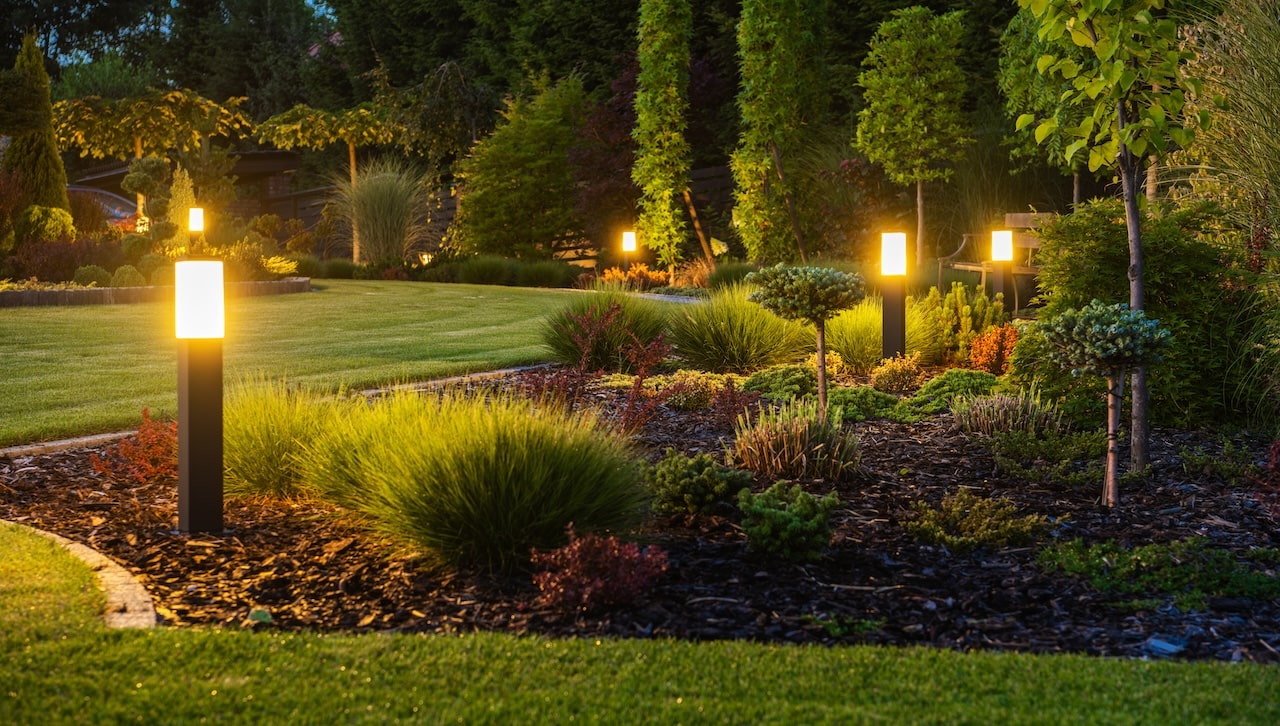
Edge, Step, and Wall Lighting
For stairs, use low-glare, under-tread or face-mounted step lights that reveal each riser without shining in anyone’s eyes. Along seat walls and columns, compact integrated fixtures create a comfortable glow that eliminates dark corners and defines the patio’s edges.
Around the perimeter, soft wash lights aimed into planting beds make the hardscape feel larger and more inviting after dark, adding ambiance without overpowering the space.
Budget Pairing: What to Allocate Where
A common budget split for patio-centric projects:
- 80–90% to the patio itself (base prep, concrete/pavers, drainage).
- 10–20% to lighting (conduit, transformer, fixtures, labor).
That 10–20% can be the difference between a gorgeous-but-dark patio and an evening-ready outdoor room.
Oregon Style Guide: Lighting Looks That Fit the Rogue Valley
Landscapes that M&B Landscaping design around Grants Pass often mix cedar, river rock, basalt, and drought-tolerant plantings, so your lighting should flatter those textures while keeping glare in check.
Aim for subtle, layered illumination that warms wood tones, reveals stone depth, and preserves nighttime comfort—especially important on rainy evenings when reflections can amplify glare.
Warm White vs. Neutral White Outdoors
Use 2700K (warm) where you want a cozy, relaxing feel—it’s especially flattering on cedar, red and brown stone, and around seating areas. Reserve 3000K (neutral warm) for foliage-forward zones; it’s crisp enough to render greens on conifers and ornamental grasses without drifting into a blue cast.
A balanced approach works best in the Rogue Valley: warm tones for hardscapes and gathering spaces, neutral-warm for plant highlights, blended so the scene reads cohesive after dark.
Highlighting Water, Stone, and Evergreen Structure
For wood and stone, soft grazing along cedar fencing or basalt walls pulls out natural texture without hotspots. Specimen evergreens—like a pine or incense cedar—benefit from gentle cross-lighting to add depth; keep beams narrow and well-aimed to avoid spill.
Along paths, choose shielded fixtures and maintain thoughtful spacing to prevent the “runway” effect and keep eyes comfortable on rainy nights, when wet surfaces can bounce light back toward viewers.
Planning Timeline — From Idea to Switch-On (Under 4 Weeks)
Week 1 — Discovery & Draft Plan
Start with a discovery call and site walk to identify zones (entry, walkways and paths, patio, specimen trees). Capture measurements, photos at dusk, and any patio details. Your contractor drafts a layout showing fixture types, transformer size, cable runs, and control options, then issues a preliminary proposal.
Week 2 — Finalize & Prep
Approve the layout and proposal, place fixture/transformer orders, and schedule utility locates if trenching is required. If a new patio is part of the project, coordinate sleeves/conduit before the pour and mark exact locations for step, wall, or column lights. Any minor plan tweaks get locked in here.
Week 3 — Rough-In & Conduit
Install trenching and low-voltage cable routes, set PVC sleeves under slabs and across expansion joints, mount the transformer, and run home runs to each zone. If the patio is being poured, sleeves go in now. Perform a daytime set-out of fixtures and a quick evening pre-aim where possible.
Week 4 — Set, Aim, and Switch On
Terminate wet-rated connectors, set fixtures permanently, and program timers/app controls. Do a full night aiming to reduce glare, balance brightness, and eliminate hot spots, then complete a homeowner walkthrough covering maintenance and future expansion points.
Maintenance & Upgrades
LED systems are low-touch, but a little care keeps them looking their best.
| Task | Why It Matters | When | DIY or Pro |
| Wipe lenses & caps | Removes dust/pollen/smoke film | 2–3x/yr | DIY |
| Re-aim after plant growth | Prevents blocked beams/glare | Spring/Fall | DIY/Pro |
| Check connectors | Wet-rated connections stay tight | Annually | Pro preferred |
| Add dimming/controls | Fine-tune ambiance & savings | Anytime | Pro |
| Upgrade halogen to LED | Slash energy & heat | During refresh | Pro |
FAQs for Southern Oregon Homeowners
Will lights attract bugs?
Warm-white LEDs (2700–3000K) tend to attract fewer insects than cooler, blue-leaning light. Aim fixtures down and away from doors and seating.
Can I add lights later?
Yes. A well-sized transformer and extra conduit/sleeves make expansions painless. Many clients start with paths and a couple of trees, then add patio layers the following season.
Solar or wired in our climate?
Wired low-voltage is more reliable, brighter per fixture, and easier to aim precisely. Solar can be useful for very small, standalone areas with full sun exposure.
How do I avoid glare on rainy nights?
Use shielded fixtures, lower mounting heights, and careful aiming. Keep path light sources hidden from view, and avoid over-lighting.
What color temperature looks best here?
2700K near wood/stone seating areas; 3000K for conifers and plant texture. Mix them thoughtfully for balance.
What about wildfire season?
LED fixtures run cool compared to old halogens. Keep vegetation trimmed around fixtures and transformers, and avoid lighting low, dry grasses.
Get a Local Estimate in Grants Pass
If you’re weighing a new patio alongside lighting—or just want to brighten existing landscape and gardening work—gather a few photos at dusk, rough measurements, and any inspiration images. Then request a line-item proposal from a landscape lighting installation provider who serves Grants Pass, Merlin, Rogue River, and the wider Rogue Valley.
For a local partner, reach out to M & B Landscaping and ask them to include conduit under any planned slab so your cost of concrete patio installed covers sleeves and future-proofing from the start.