A well-designed fire pit transforms your backyard into a gathering space that extends your living area, creates year-round entertainment opportunities, and adds measurable value to your home. Whether you envision cozy family nights roasting marshmallows or hosting weekend gatherings with friends, the right design balances safety, comfort, and style.
This guide walks you through every decision—from site selection and patio construction to hardscaping materials, seating arrangements, pathways, lighting, and using retaining walls to reclaim sloped yards.
Start with a Plan: Purpose, Budget, and Style
Before breaking ground, clarify what you want from your fire pit area. A clear vision saves money, prevents scope creep, and ensures the finished space actually works for how you live.
How You’ll Use the Space
Think about typical use cases.
Will this be an intimate gathering spot for four people, or do you need seating for a dozen guests?
Are you focused on ambiance, or do you want cooking capabilities with a rotisserie or grill grate?
Consider whether the fire pit will stand alone or integrate with a built-in grill or outdoor kitchen to create a true outdoor hub. Answering these questions upfront shapes everything from pit size to seating layout and material budgets.
Set a Realistic Budget
Fire pit projects range from $2,000 DIY kits to $20,000+ custom masonry installations with integrated seating and lighting. Know where to save and where to splurge:
- Invest in proper base prep and drainage. Cutting corners here leads to settling and cracking.
- Choose hardscape materials that fit your budget without sacrificing durability
- Decide whether gas line installation is worth the convenience
- Plan for quality lighting that enhances safety and ambiance
- Budget separately for furniture and accessories.
Read More: How to Build a Low-Maintenance Landscape
Choose a “Design Language”
Your fire pit should feel like a natural extension of your home’s architecture and existing hardscape. Decide on shapes—round pits create intimate, campfire-style gatherings; square and rectangular designs offer clean, modern lines and easier furniture placement.
Consider edge treatments like flush-cut pavers for contemporary looks or stacked stone for rustic charm. Select materials that complement your home’s exterior: natural flagstone for organic, mountain-home aesthetics; smooth concrete pavers for modern farmhouse or minimalist styles; aged brick or tumbled stone for traditional or cottage gardens.
Safety, Codes & Siting (Don’t Skip!)
Safety planning comes first, before you fall in love with a particular design or location. Getting this right protects your family, your home, and your investment.

Clearances & Placement
Typical safety guidelines recommend keeping fire pits at least 10 to 20 feet from structures, overhangs, and property lines. Check prevailing wind direction—you don’t want smoke blowing into your house or neighbor’s windows. Avoid low spots where water pools and steep slopes that create unstable seating. Keep adequate distance from trees and overhanging branches, especially with wood-burning pits that throw sparks.
Check Local Rules
Regulations vary widely by municipality and neighborhood. Call your local building department to ask about permits, open-flame restrictions, and whether wood-burning pits are allowed year-round or subject to seasonal burn bans. Some areas mandate gas-only fire features or require spark arrestors on wood-burning models. HOAs often have additional restrictions on size, placement, and fuel type.
Fire Pit Types
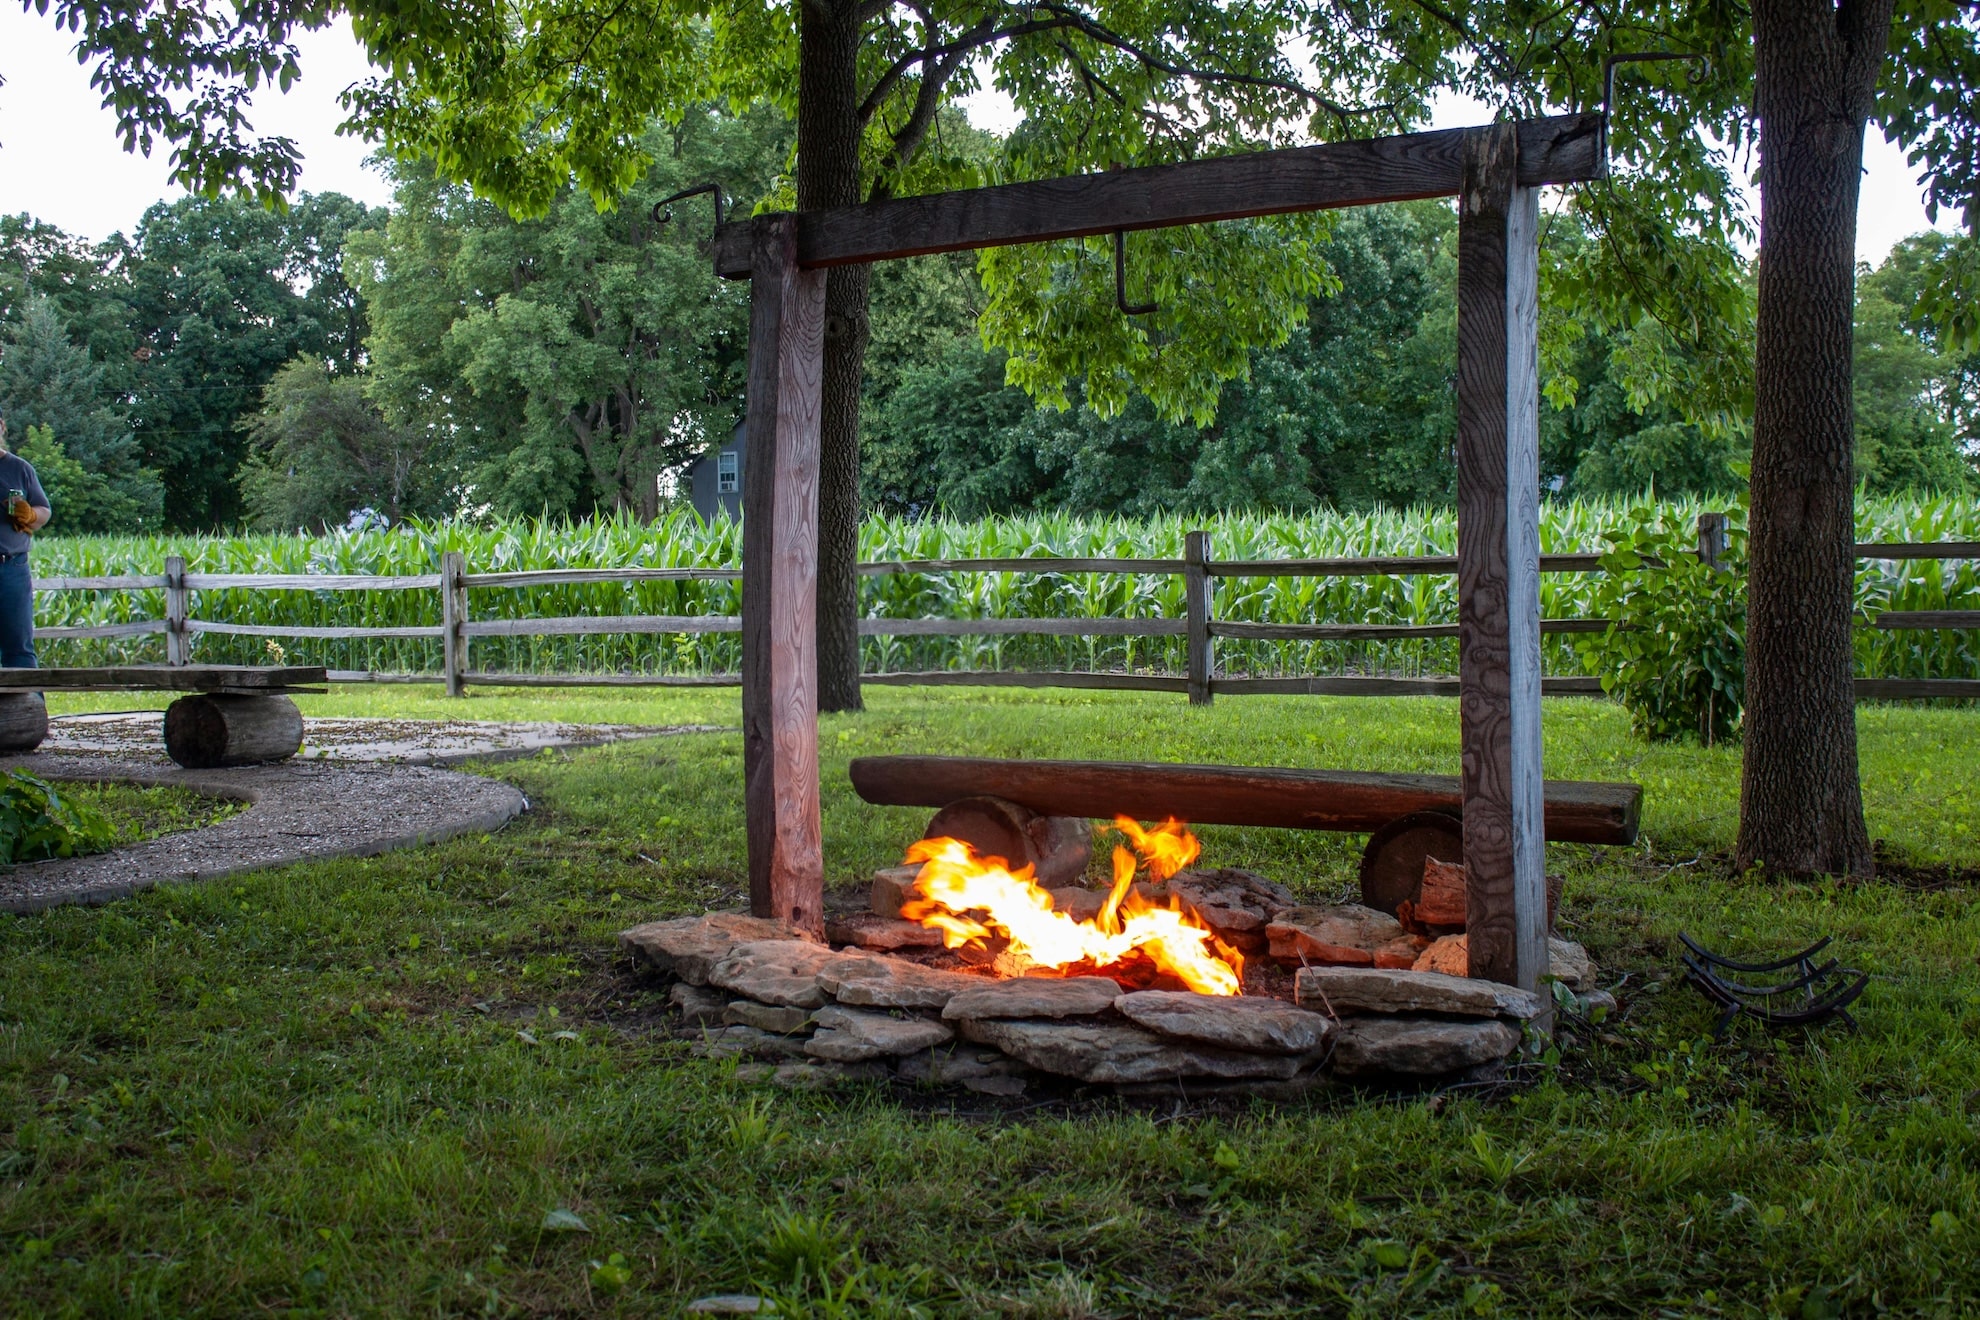
Wood-burning pits deliver the classic campfire experience—crackling sounds, authentic smell, and radiant heat. They require spark management with screens or glass panels, regular ash removal, and dry wood storage.
Gas fire pits (natural gas or propane) offer instant on-off control, no ash or smoke, and consistent flame height. They require professional gas line installation, proper ventilation around burners, and hidden tank enclosures for propane models. Gas pits cost more upfront but deliver convenience and cleaner operation.
| Safety Checklist | Typical Clearance |
| Pit to structure/overhang | 10–20 feet minimum |
| Seating distance from flame | 3–4 feet for comfort |
| Overhead clearance | 21 feet (wood); 10 feet (gas) |
| Gas shutoff access | Within 10 feet, clearly marked |
Not sure what’s allowed? M & B Landscaping designs to code and handles professional installation through our comprehensive hardscaping services.
Base & Surface: Patio Construction that Lasts
The foundation determines whether your fire pit area stays level and beautiful or cracks, settles, and puddles after the first winter. Proper patio construction isn’t optional—it’s the difference between a decade of enjoyment and expensive repairs.
Sub-Base & Drainage
Start with excavation to remove organic material and unstable soil. Install a compacted gravel base, typically 4 to 6 inches of crushed rock, in lifts with plate compaction between layers. On clay or poorly draining soils, lay geotextile fabric before adding base rock to prevent mixing and settling. Grade the entire area with a 2% slope away from structures to shed water. Never place fire pits in low spots where runoff collects.
Surface Options
- Pavers: Modular concrete or clay pavers offer easy repairs, wide color choices, and good drainage through joints. They work well for both traditional and modern fire pit designs.
- Flagstone: Irregular natural stone creates an organic, high-end look. Flagstone requires skilled installation to maintain level surfaces and proper joint spacing.
- Concrete: Poured or stamped concrete delivers clean lines and seamless surfaces. It’s durable and low-maintenance but can crack without proper control joints.
- Decomposed Granite (DG): Permeable, budget-friendly, and easy to install. DG works for casual, natural designs but requires edge restraints and occasional replenishment.
Read More: How to Choose Between Concrete or Patio Pavers

Edge Restraints & Jointing
Lock surfaces in place with plastic edge restraint (for pavers), steel edging (for DG or gravel), or mortar collars (for flagstone). Fill paver joints with polymeric sand that hardens when wet, or use traditional mortar for permanent, weed-free joints.
Build the platform right: M & B constructs durable patios with proper drainage and material selection. Explore our full project delivery through hardscaping services.
| Surface Type | Maintenance | Cost Tier | Best For |
| Concrete Pavers | Low; occasional sand refill | $$ | Versatile, repairable |
| Flagstone | Medium; reseal every 2–3 years | $$$ | High-end, natural look |
| Poured Concrete | Low; seal cracks promptly | $$ | Modern, clean lines |
| Decomposed Granite | Medium; rake & top-dress yearly | $ | Casual, permeable |
Fire Pit Construction: Kits vs. Custom Masonry
How you build the fire pit itself depends on budget, design goals, and whether you’re DIYing or hiring professionals.
Prefab Kits
Prefab fire pit kits offer speed and predictable costs. Most include fire-rated blocks, a steel ring insert, and installation instructions. Kits work well for straightforward circular or square designs and deliver functional results in a weekend. Limitations include fixed sizes, limited stone choices, and less flexibility for integrating seating walls or custom shapes.
Custom Masonry
Custom-built fire pits allow complete control over shape, stone selection, height, and features. You can match materials to existing hardscape, integrate the pit into curved seating walls, hide gas rings and ignition systems, and cap walls with comfortable seating surfaces. Custom masonry costs more and takes longer but creates a cohesive, high-end focal point.
Inserts & Liners
Whether kit or custom, protect the stone structure with steel fire bowls, paver rings, or refractory brick liners. Inserts contain ash, improve heat distribution, and prevent thermal shock that cracks masonry. They’re especially important for gas pits, where burners need stable, heat-resistant surroundings.
Want a cohesive build? See our custom fire pits & fireplaces designed and installed to match your landscape.
Reclaim Sloped Yards with Retaining Walls
Sloped backyards often leave homeowners with unusable space. Retaining walls transform grades into tiered outdoor living areas perfect for fire pits.
Step-Terrace Concepts
Create level platforms at different elevations: an upper deck for dining and grilling, a mid-level transition with steps and planters, and a lower terrace for the fire pit and seating. Each tier feels like a distinct room while remaining visually connected. Safe step transitions with proper riser heights (6 to 8 inches), tread depths (12+ inches), and handrails on steep runs make multi-level designs accessible and code-compliant.
Wall Materials & Drainage
- Segmental retaining wall (SRW) blocks: Engineered, interlocking units that install quickly and handle significant loads. Available in various colors and textures.
- Natural stone: Stacked fieldstone or cut stone offers an organic, timeless look but requires skilled masons and costs more than SRW blocks.
- Poured concrete: Strongest option for tall walls or heavy loads. Concrete can be stamped, stained, or faced with stone veneer for aesthetics.
All retaining walls need drainage: perforated pipe behind the wall, gravel backfill for drainage, weep holes every 4 to 6 feet, and geotextile fabric to prevent soil intrusion. Walls over 4 feet typically require engineering and permits.
Professionally engineered walls: M & B designs and installs structurally sound retaining walls with proper drainage and long-term stability.
Pathways to the Fire Pit
If your fire pit sits away from the house, a well-designed pathway makes access inviting and safe, even after dark or in wet weather.
Path Materials
- Flagstone on decomposed granite: Natural look with good drainage and traction. Flagstone stepping stones set in DG create a casual, garden-style path.
- Pavers: Durable, modular, and easy to repair. Use permeable pavers or leave joints open for drainage.
- Gravel with steel edging: Budget-friendly and fast-draining. Choose pea gravel or crushed stone (avoid round river rock, which rolls underfoot).
- Step risers on slopes: Stone or timber steps transition steep grades safely. Combine with landings every 10 to 12 feet for rest stops.
Wayfinding & Comfort
Paths should be 36 to 48 inches wide—wide enough for two people to walk side by side. Add landing pads at turns and direction changes for stability. On steep runs, install handrails and ensure non-slip surfaces (brushed concrete, textured pavers, or gravel).
Build safe, beautiful access: M & B designs and installs walkways & pathways that connect your outdoor spaces seamlessly.
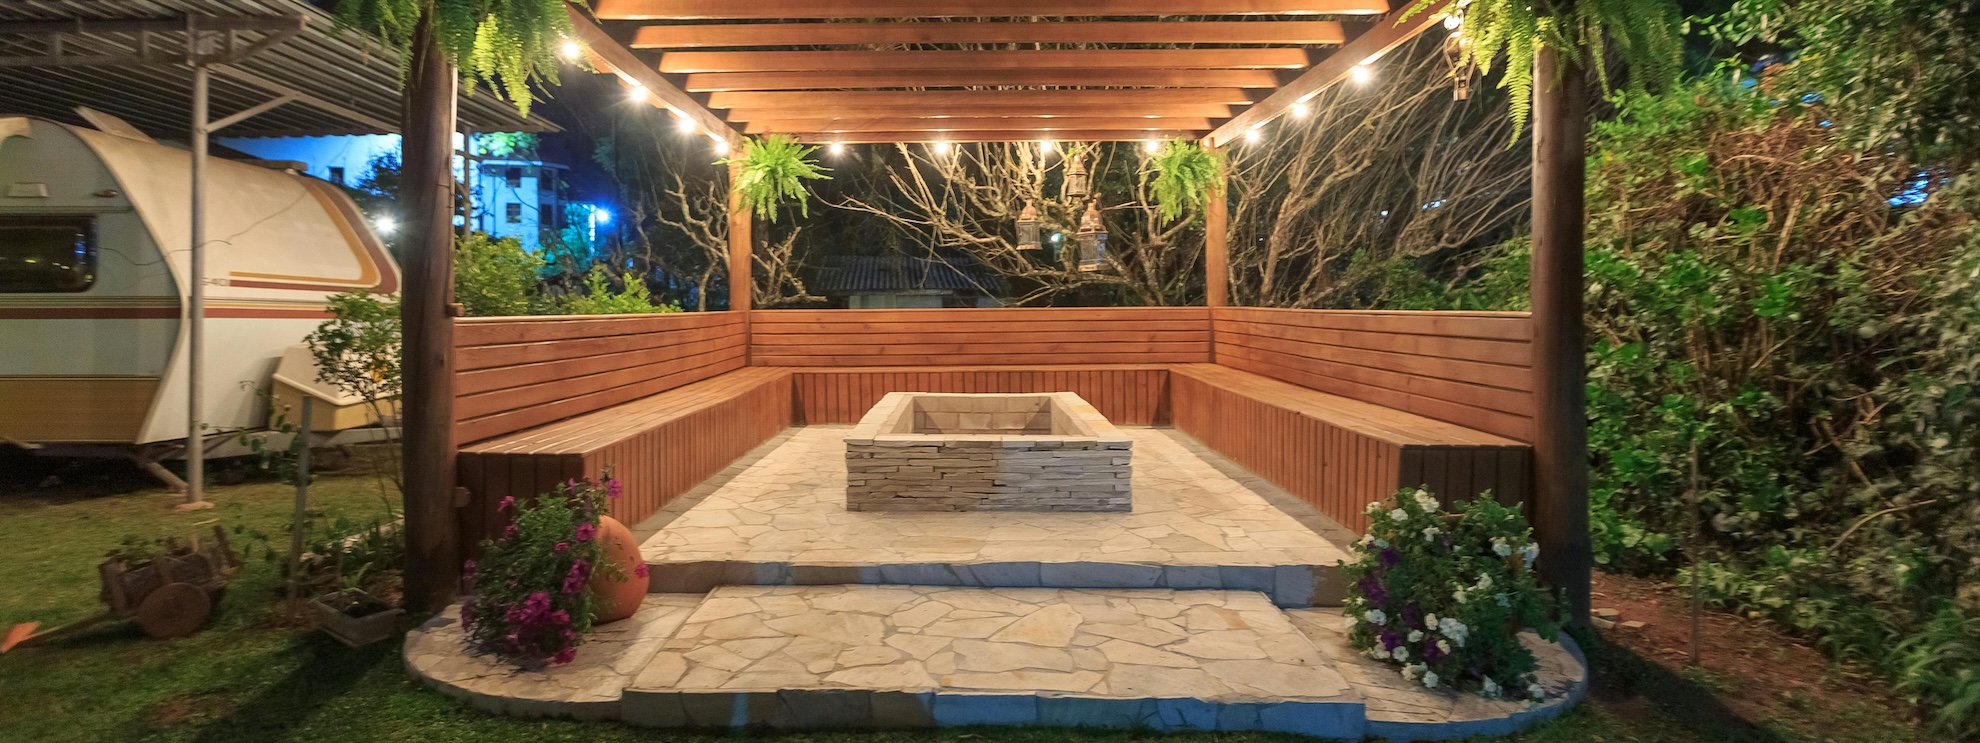
Lighting the Space
Layered lighting transforms your fire pit area from a daytime-only space into an enchanting nighttime destination. Done right, lighting enhances safety and ambiance without glaring or creating harsh shadows.
Fixtures
- Path lights: Low-voltage fixtures along walkways prevent trips and guide guests safely. Space them every 6 to 8 feet for continuous illumination.
- Step lights: Recessed into risers or mounted on adjacent walls, step lights highlight elevation changes and prevent stumbles.
- Under-cap wall lights: Installed beneath seating wall caps, these fixtures wash light across paving and create a floating effect.
- Downlights from trees or pergolas: Mimics moonlight, casting dappled shadows and highlighting textures. Keep beams wide and soft.
Choose warm color temperatures (2700K to 3000K) that complement firelight. Avoid cool white or blue-toned LEDs, which feel clinical outdoors.
Controls
Use low-voltage transformers (12V) for safety and energy efficiency. Smart timers or controllers let you set schedules, adjust brightness, and create zones—”party mode” with full brightness, or “relax mode” with dim path lights and under-cap accents.
We integrate lighting in one seamless build: M & B plans and installs outdoor lighting as part of our hardscaping services, so wiring is hidden and fixtures are positioned for optimal effect.
Read More: Is Landscape Lighting Right for Your Backyard Project?
Finishing Touches: Decor, Planting & Accessories
Details elevate a functional fire pit into a true outdoor living room.
Planting
Choose low, heat-tolerant plantings for areas near the fire pit. Avoid resinous shrubs like junipers and pines within 10 feet—they’re highly flammable. Instead, use succulents, ornamental grasses, lavender, rosemary, and low groundcovers. Evergreen structure provides year-round interest, while deciduous perennials add seasonal color.
Read More: Best Nurseries to Buy Plants, Trees, and Shrubs Near Grants Pass
Furnishings & Accessories
Invest in outdoor-rated furniture with UV-resistant fabrics and rust-proof frames. Heat-resistant outdoor rugs define seating areas and add comfort underfoot. Side tables provide surfaces for drinks and s’mores supplies. Weatherproof covers protect furniture when the fire pit isn’t in use. Plan storage for cushions—a nearby shed, deck box, or built-in bench with hinged lids keeps them dry.
Connect to the Rest of the Yard
Design sightlines from the fire pit to other landscape features: a water feature for soothing sounds, a view into the garden for seasonal interest, or a connection to an outdoor kitchen for seamless entertaining. The fire pit shouldn’t feel isolated—it should anchor a network of outdoor spaces that flow naturally.
Ready to Design? M & B Landscaping Can Help
From concept sketches to the final lighting install, M & B Landscaping delivers complete fire pit projects that blend safety, style, and durability. We handle every detail: site evaluation and code compliance, hardscape construction with proper drainage and lasting materials, custom masonry fire pits or professional kit installation, gas line and electrical work by licensed contractors, integrated seating walls and pathways, and layered lighting for safety and ambiance.
Whether you’re reclaiming a sloped backyard with retaining walls, connecting your fire pit to an outdoor kitchen, or simply want a cozy spot for family nights, we bring the expertise and equipment to make it happen right the first time.
Schedule a Site Visit | Request a Project Quote
Let’s create a backyard fire pit area where memories are made and every evening feels like a retreat.