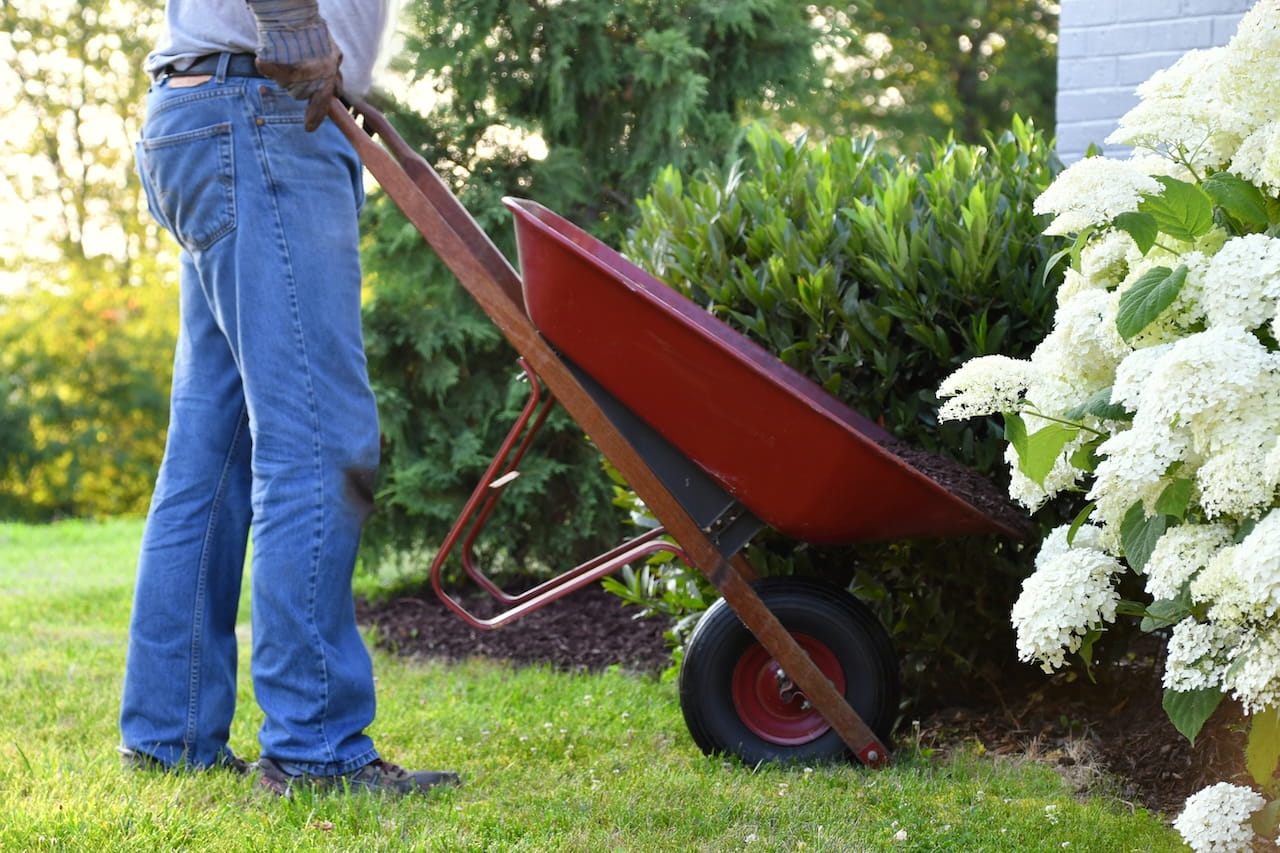
Mulching a garden is one of the most effective ways to improve soil health, retain moisture, suppress weeds, and protect plant roots from temperature extremes. As a core component of modern lawn and soil care, mulch transforms bare garden beds into thriving, low-maintenance landscapes that support healthy plant growth season after season. Yet despite its simplicity, mulching is frequently done incorrectly—and improper mulching can actually harm plants, encourage disease, and waste time and money. Understanding common mulch mistakes helps homeowners avoid these pitfalls and maximize the benefits of this essential landscape practice. Good mulching practices also support successful planting projects such as transplanting irises and establishing deer resistant evergreen shrubs, creating a foundation for beautiful, sustainable landscaping that performs well in Southern Oregon conditions.
Why Mulching Is Essential for Healthy Lawn & Soil Projects
Mulch plays a critical role in soil management and overall landscape health. Properly applied organic mulch creates a protective layer that moderates soil temperature, keeping roots cooler in summer and warmer in winter. This temperature regulation is particularly valuable in Southern Oregon where summer heat can stress shallow-rooted plants. Mulch dramatically improves soil moisture retention by reducing evaporation from the soil surface, meaning plants require less frequent irrigation and water resources stretch further during dry months. Weed suppression is another major b genefit—a proper mulch layer blocks sunlight from reaching weed seeds, preventing germination and reducing the need for chemical herbicides or manual weeding. Over time, organic mulch decomposes and improves soil structure by adding beneficial organic matter that enhances drainage, aeration, and nutrient availability. Finally, mulch protects plant roots from mechanical damage during mowing or foot traffic and creates a buffer zone that prevents soil splash and erosion during heavy rain.
Mulch Benefits vs. Bare Soil Conditions
| Factor | Mulched Beds | Bare Soil |
| Moisture Retention | High – reduced evaporation | Low – rapid water loss |
| Weed Pressure | Low – light blocked from seeds | High – open germination surface |
| Soil Temperature | Moderated – cooler in summer, warmer in winter | Extreme – fluctuates with air temp |
| Soil Erosion | Minimal – surface protected | High – splash and runoff issues |
| Organic Matter | Increasing – mulch breaks down | Static or declining |
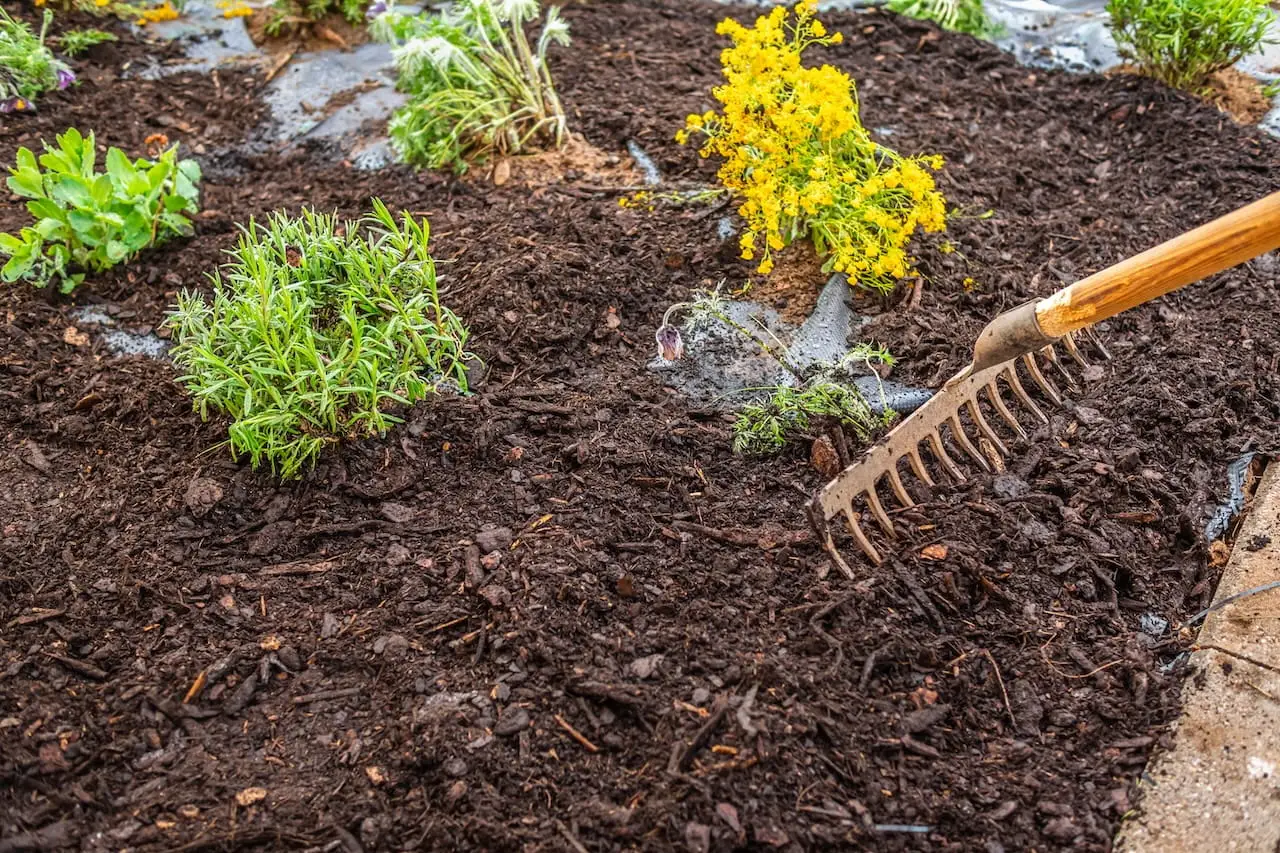
Mistake #1: Applying Too Much Mulch
One of the most common landscaping mistakes is piling mulch too deep. While it may seem that more mulch provides better protection, excessive depth actually suffocates plant roots by restricting oxygen exchange between soil and air. The ideal mulch depth for most garden beds is 2 to 3 inches—enough to provide benefits without creating problems. Mulch layers deeper than 4 inches can prevent water from reaching the soil surface, causing it to run off rather than soak in. Root systems may grow up into the mulch layer rather than down into soil, making plants more vulnerable to drought stress and instability. When applying mulch for garden beds, measure depth with a ruler or use the three-finger test—proper mulch should be about as deep as three fingers laid flat. If you’re refreshing existing mulch, account for what’s already there and add only enough to bring the total depth to the recommended range.
Mistake #2: Creating ‘Mulch Volcanoes’ Around Trees and Plants
Mulch volcanoes—those cone-shaped piles of mulch stacked against tree trunks and plant stems—are a widespread problem that causes serious damage over time. When mulch contacts bark or stems, it traps moisture against the plant tissue, creating ideal conditions for rot and fungal diseases. Insects and rodents burrow into these mulch piles, using them as shelter while feeding on bark and cambium tissue. Root systems can be damaged as roots grow into the mulch rather than spreading properly through soil. The solution is simple: pull mulch back to create a 3- to 6-inch gap around tree trunks and a 2- to 3-inch gap around shrub and perennial stems. This donut-shaped mulch application provides all the benefits of mulching garden beds correctly while preventing moisture and pest problems at the crown. Remember that the root flare—where trunk transitions to roots—should always be visible above the mulch line.

Mistake #3: Using the Wrong Type of Mulch for Your Landscape
Not all mulch types work equally well for every landscaping project. Bark mulch is attractive and long-lasting, making it the best mulch for landscaping in ornamental beds where appearance matters. Wood chips decompose more quickly but provide excellent soil improvement in vegetable gardens and informal planting areas. Compost mulch delivers immediate nutrient benefits and works well for annual beds that will be turned over seasonally. Straw is ideal for vegetable gardens because it’s easy to incorporate into soil at season’s end. Rock mulch suits xeriscapes and areas where you want permanent, low-maintenance coverage, though it doesn’t improve soil structure like organic options. Choosing the wrong mulch can affect water retention—fine-textured mulches may become water-repellent when dry, while coarse materials allow better water penetration. Consider your specific goals for each bed area and select mulch types accordingly rather than using the same material everywhere.
Common Mulch Types and Best Uses
| Mulch Type | Best Uses | Longevity | Soil Benefits |
| Bark Mulch | Ornamental beds, shrubs, trees | 2-3 years | Moderate organic matter |
| Wood Chips | Paths, informal areas, vegetable gardens | 1-2 years | High organic matter |
| Compost | Annual beds, vegetable gardens | 1 season | Very high nutrients |
| Straw | Vegetable gardens, temporary cover | 1 season | Moderate organic matter |
| Rock/Gravel | Xeriscapes, permanent beds, pathways | Permanent | None |
Mistake #4: Mulching Without Preparing the Soil First
Mulch works best when applied to properly prepared soil, yet many homeowners skip this critical step. Spreading mulch over compacted soil, existing weeds, or uneven beds reduces effectiveness and creates long-term problems. Before mulching garden beds correctly, remove all weeds by hand or with appropriate tools—mulch suppresses new weed germination but won’t eliminate established growth. Loosen compacted soil with a garden fork or broadfork to improve drainage and root penetration. Add compost or other soil amendments to address nutrient deficiencies or pH issues identified through soil testing. Level the bed surface to prevent mulch from sliding off high spots or accumulating too deeply in low areas. This preparation integrates mulch properly into lawn and soil projects, ensuring maximum benefit from your time and material investment. Well-prepared beds require less maintenance over time and support healthier plant growth.
Mistake #5: Ignoring Timing When Mulching a Garden
Timing significantly affects how well mulch performs in your garden. The best time to apply mulch is spring after soil has warmed to at least 60 degrees—typically late April or early May in Southern Oregon. Mulching too early when soil is still cold can delay warming and slow spring plant growth, particularly for warm-season vegetables and annuals. Fall mulching offers different benefits, protecting plant roots through winter and preventing frost heaving in perennial beds. However, fall applications should wait until plants have gone dormant to avoid encouraging late-season growth that could be damaged by frost. Mulch timing also affects soil microbial activity—spring applications support the surge of beneficial organisms that break down organic matter and make nutrients available to plants. Understanding these timing considerations helps you coordinate mulching with other garden tasks for optimal results.
Mistake #6: Not Considering Planting Projects Like Transplanting Irises
When to transplant irises is a common question that intersects directly with mulching practices. Irises transplant best in late summer or early fall—typically late July through September in Southern Oregon—after blooming has finished but before winter dormancy. This timing allows roots to establish before cold weather arrives. Mulch can protect newly transplanted iris roots from temperature fluctuations and moisture stress, but application technique matters enormously. Bearded iris rhizomes should sit at or just below the soil surface with their tops exposed to sunlight, so mulch must be kept away from the rhizomes themselves to prevent rot. Apply a thin layer of mulch between iris clumps to suppress weeds and moderate soil temperature, but leave a 4- to 6-inch clear zone around each rhizome. Coordinating mulch application with plant transplanting ensures both practices support rather than undermine each other, creating healthier, more resilient garden beds.
Iris Transplanting and Mulching Timing
| Season | Iris Activity | Mulching Recommendation |
| Late Summer/Early Fall | Best transplanting window | Light mulch between plants only |
| Winter | Dormant period | Keep rhizomes exposed |
| Spring | Active growth and blooming | Remove winter mulch if applied |
Mistake #7: Overlooking Deer-Resistant Landscaping Options
In areas like Southern Oregon where deer browsing damages gardens, incorporating deer resistant shrubs evergreen into mulched beds protects your landscape investment while reducing maintenance. These plants provide year-round structure, require less replacement due to wildlife damage, and create low-maintenance landscaping that performs consistently. Evergreen options are particularly valuable because they maintain visual interest through winter when deciduous plants are dormant. Boxwood varieties offer formal structure and dense foliage that deer generally avoid. Oregon grape provides native beauty with spiny, holly-like leaves that deter browsing. Juniper species range from low groundcovers to upright shrubs, all with aromatic foliage deer dislike. Certain holly varieties combine evergreen foliage with seasonal berries for year-round appeal. When planting these deer resistant plants Oregon natives or adapted species, proper mulching supports establishment and ongoing health while creating an integrated landscape that resists both pests and wildlife damage.
Deer-Resistant Evergreen Shrubs for Southern Oregon
| Shrub | Mature Size | Deer Resistance | Best Features |
| Boxwood | 2-8 ft (variety dependent) | High | Dense foliage, formal structure |
| Oregon Grape | 3-6 ft | Very High | Native, spiny leaves, yellow flowers |
| Juniper | 1-15 ft (variety dependent) | High | Aromatic foliage, drought tolerant |
| Holly (select varieties) | 6-15 ft | Moderate to High | Spiny leaves, seasonal berries |
Mistake #8: Forgetting That Mulch Breaks Down Over Time
Organic mulch naturally decomposes, improving soil structure and fertility—but this means it needs periodic replenishment. Most bark and wood-based mulches should be refreshed annually, typically in spring before the growing season begins. Soil organisms including bacteria, fungi, and invertebrates break down organic matter, gradually converting mulch into humus that enriches soil. This decomposition is beneficial, but it reduces the effective depth of your mulch layer over time. Old mulch may become compacted or develop a water-repellent crust that needs to be raked or broken up before adding fresh material. Check mulch depth each spring and fall, adding new mulch as needed to maintain the recommended 2- to 3-inch layer. In areas with heavy decomposition or where mulch has washed away or been scattered, you may need to remove degraded material before applying fresh mulch to avoid excessive buildup.
Mistake #9: Neglecting Irrigation and Water Management
While mulch significantly improves moisture retention, it doesn’t eliminate the need for proper irrigation. Mulch and irrigation work together as complementary components of lawn and soil management. Mulch reduces evaporation from the soil surface, meaning irrigation water penetrates deeper and lasts longer rather than quickly evaporating in hot weather. This efficiency allows you to water less frequently while maintaining consistent soil moisture that supports healthy plant growth. However, thick mulch can sometimes prevent light rainfall from reaching soil, and improper irrigation—sprinklers hitting mulch rather than soil—can leave plants dry even when the mulch appears damp. Check soil moisture beneath mulch layers regularly during dry periods, and adjust irrigation schedules based on actual soil conditions rather than surface appearance. Drip irrigation or soaker hoses work particularly well with mulched beds because they deliver water directly to the root zone beneath the mulch layer.
Mistake #10: Treating Mulching as a One-Time Job
Effective mulching requires ongoing attention as part of landscape mulch maintenance rather than being a one-and-done task. Seasonal bed maintenance includes monitoring mulch depth, removing weeds that break through the mulch barrier, and watching for signs of problems like fungal growth or insect nests. Weed removal stays easier when you catch seedlings early before they establish deep roots through the mulch layer into soil. Soil monitoring beneath mulch helps you track moisture levels, identify compaction issues, and determine when amendments might be needed. Refreshing mulch layers on an annual or biannual schedule maintains effectiveness and keeps beds looking neat and well-maintained. This consistent attention prevents small issues from becoming major problems and ensures your mulch continues providing maximum benefit year after year.
How Proper Mulching Supports Healthier Landscapes
When done correctly, mulching transforms garden beds into thriving, low-maintenance landscape features that support healthy soil ecosystems and robust plant growth. Healthier garden soil practices built around proper mulch use create conditions where beneficial microorganisms, earthworms, and other soil life flourish, cycling nutrients and improving soil structure naturally. Reduced weed pressure means less competition for water and nutrients, allowing desirable plants to perform at their best. Better plant growth results from the combined benefits of temperature moderation, moisture retention, and gradual organic matter enrichment that well-mulched beds provide. Improved moisture retention reduces irrigation costs and supports plants through drought stress. Stronger garden beds require less intervention over time, reducing labor and chemical inputs while increasing aesthetic appeal and property value. These compounding benefits make mulching one of the most cost-effective investments in sustainable landscaping practices.
Build Healthier Garden Beds With Smart Mulching
Mulching a garden is a foundational practice in successful lawn and soil projects, but only when done with attention to depth, timing, material selection, and ongoing maintenance. Avoiding these ten common mistakes ensures your mulching efforts deliver maximum benefit rather than inadvertently harming plants or creating new problems. Combine thoughtful mulching practices with smart plant choices—including deer resistant evergreen shrubs that reduce wildlife damage—and proper transplant timing for species like irises to create resilient, beautiful landscapes that require less water, fewer chemicals, and less ongoing maintenance. Whether you’re establishing new beds or refreshing existing landscapes, taking time to mulch correctly pays dividends in healthier soil, stronger plants, and outdoor spaces you can enjoy with confidence.
Need Help With Professional Garden Bed Maintenance?
M&B Landscaping helps Southern Oregon homeowners create and maintain healthy, beautiful garden beds with proper mulching and soil care practices.